This article will help you
- Create a tag
- Tag ideas
- Edit tags
- Add tags to multiple ideas at once
Tags are a great way to organise and manage ideas. Easily find and identify the right ideas to work with and export for your reports.
Create tags
- Click on Admin and then on Tags in the drop-down menu.
- Click on Create tagand type in the name of the tag. Then click on Create*.*
Tag ideas
There are a couple of ways of tagging ideas:
- You can add the tag in the user level
- You can add the tag in the admin level, especially when you want to tag a large number of ideas at once.
Add tags in the user level
Click on an idea and then open the Manage tab in the right navigation, then on Add tag and then on the tag you want to add to the idea.
Tip: You can use the arrow keys to go to the next idea.
Add tags in the admin level
- Click on Admin and then on All ideasin the dropdown menu.
- Select the idea you want to tag and then click on Add or remove tags in the upper right corner. Click on tags you want to add to the list or create new tags.
Add tags to multiple ideas using Excel
In case you want to tag multiple ideas, you can upload an updated list of ideas in Excel format to the Nosco platform and so tag all ideas at once.
- Click on Admin and then on All ideas in the dropdown menu.
2. Select the ideas you want to export and then click on

in the upper right corner of the list.
Tip: Filter by Spaces, Channels, Tags and much more. Learn more about the filter here.
Click on Export ideas.
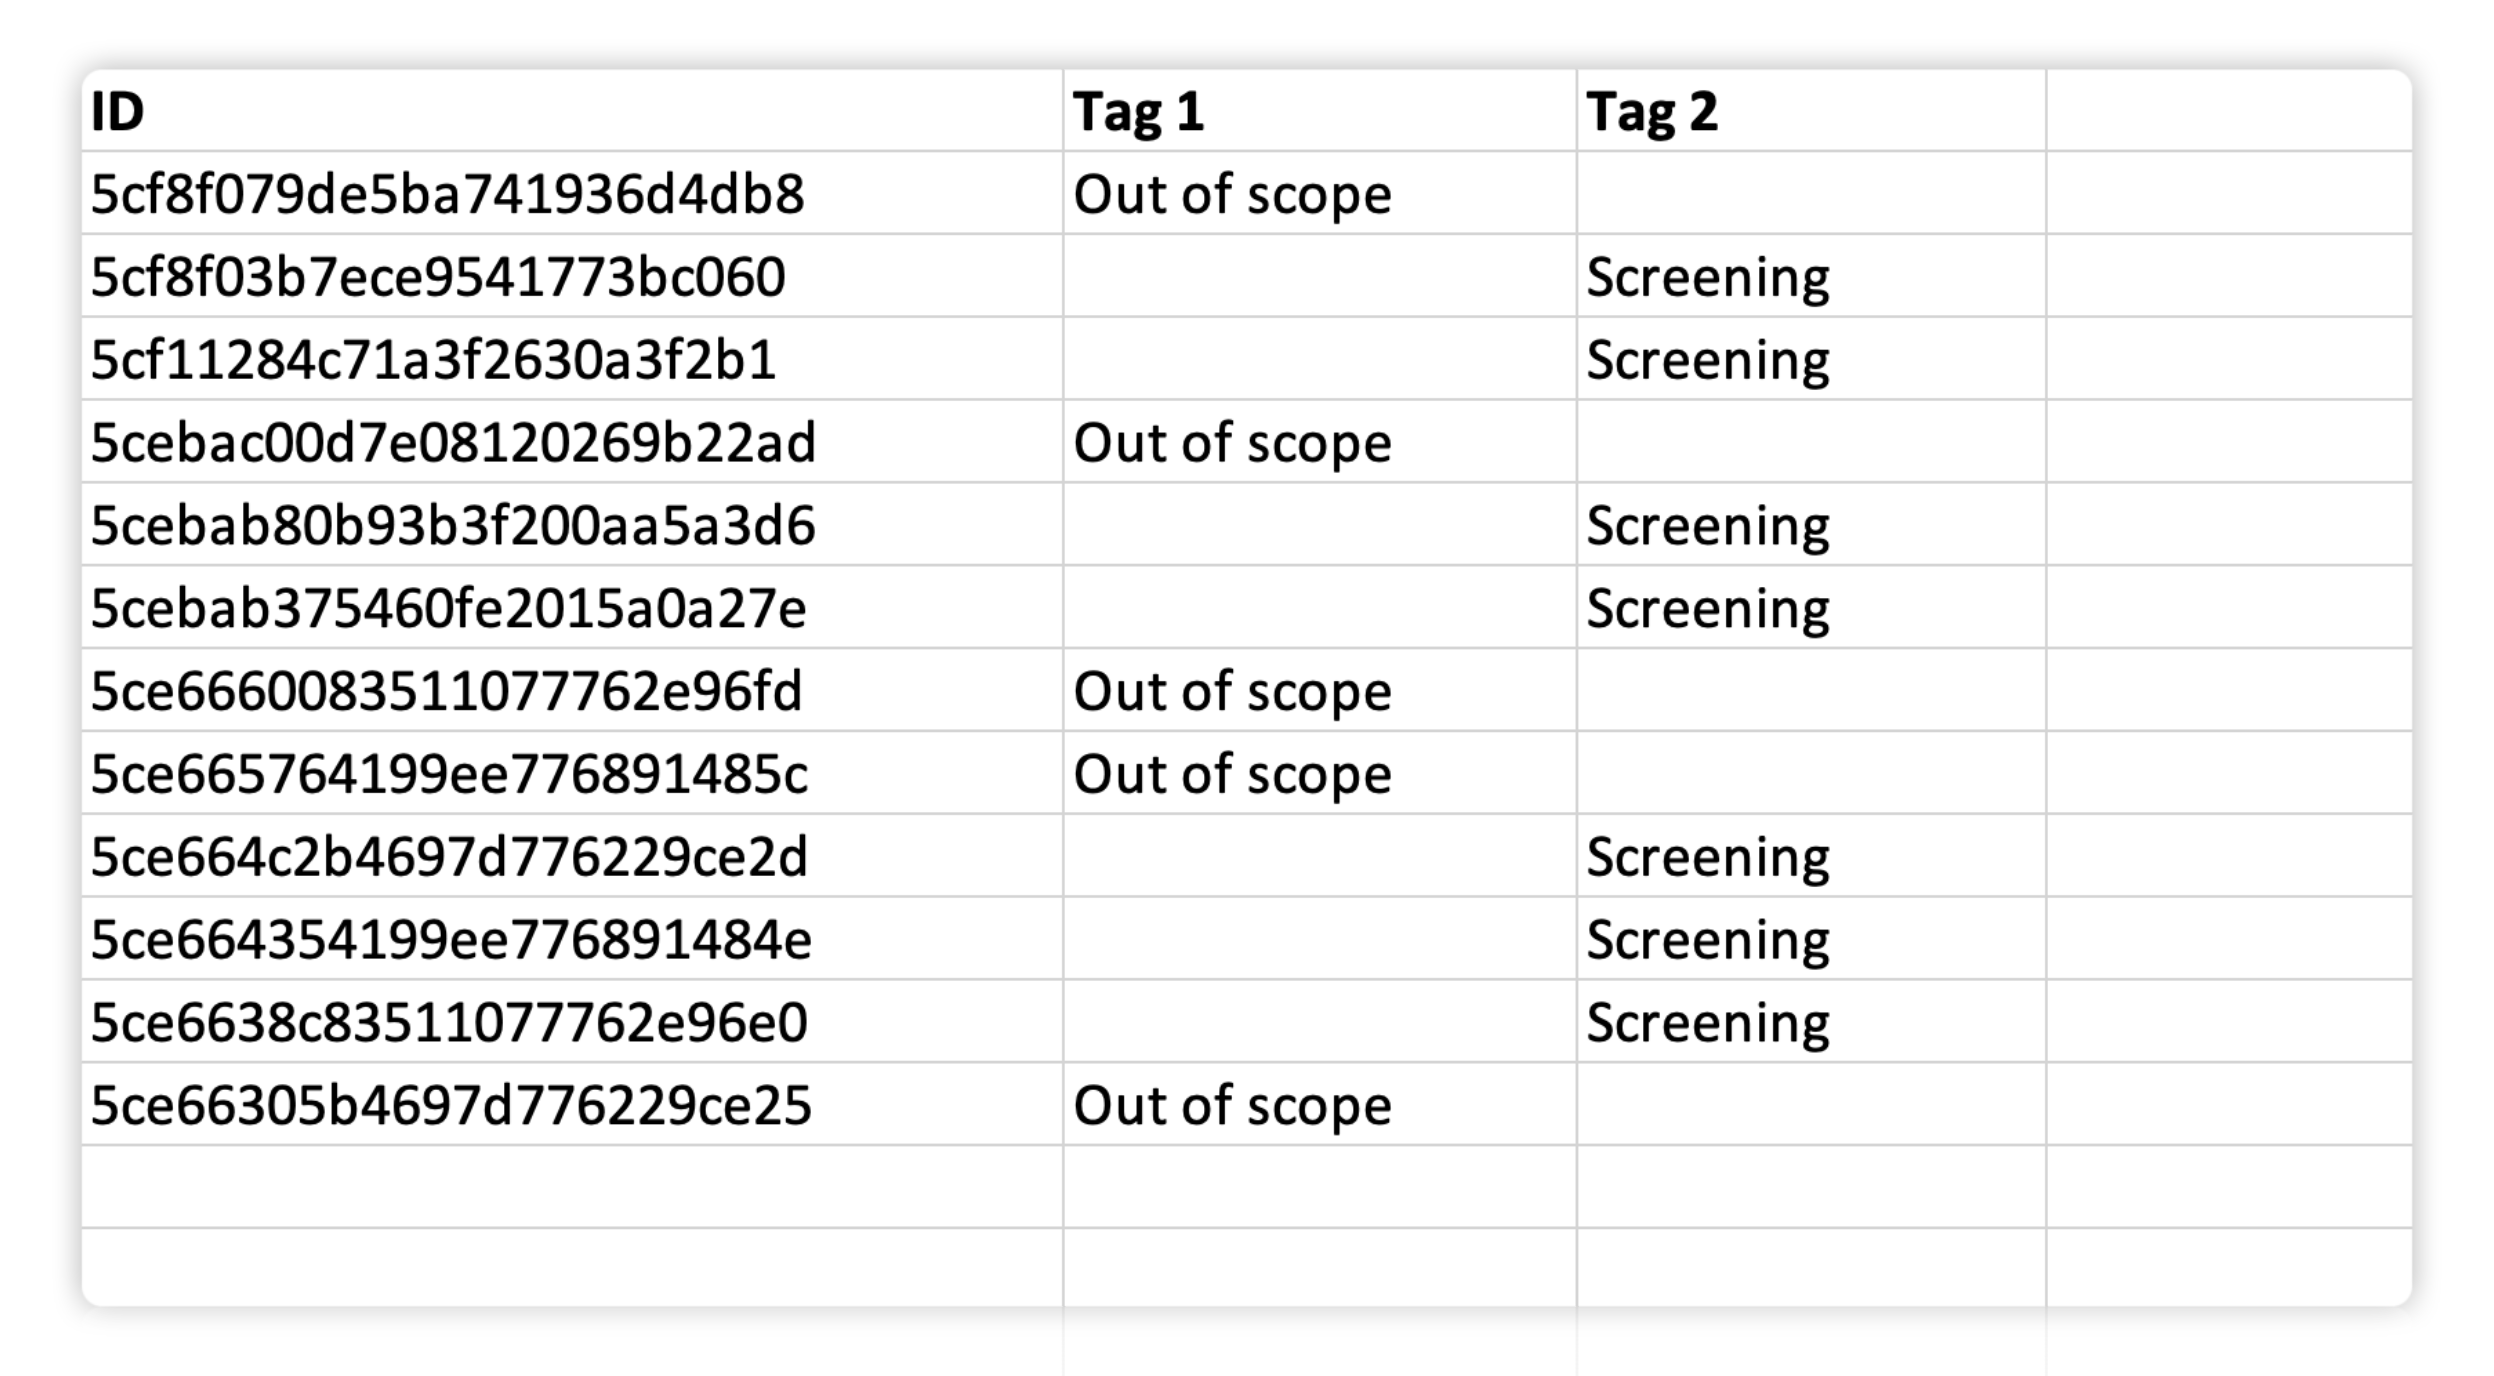
Open the file in Excel and remove all unnecessary columns. The spreadsheet needs to at least include the idea ID. Create a new column for each tag and save the spreadsheet as xlsx. file.
- Back on the platform in All ideas click on
and then on Tagsin the dropdown menu.
Drag and drop the Excel file in the dedicated area.
Match the columns with the right headers and then click on Next in the bottom left corner.
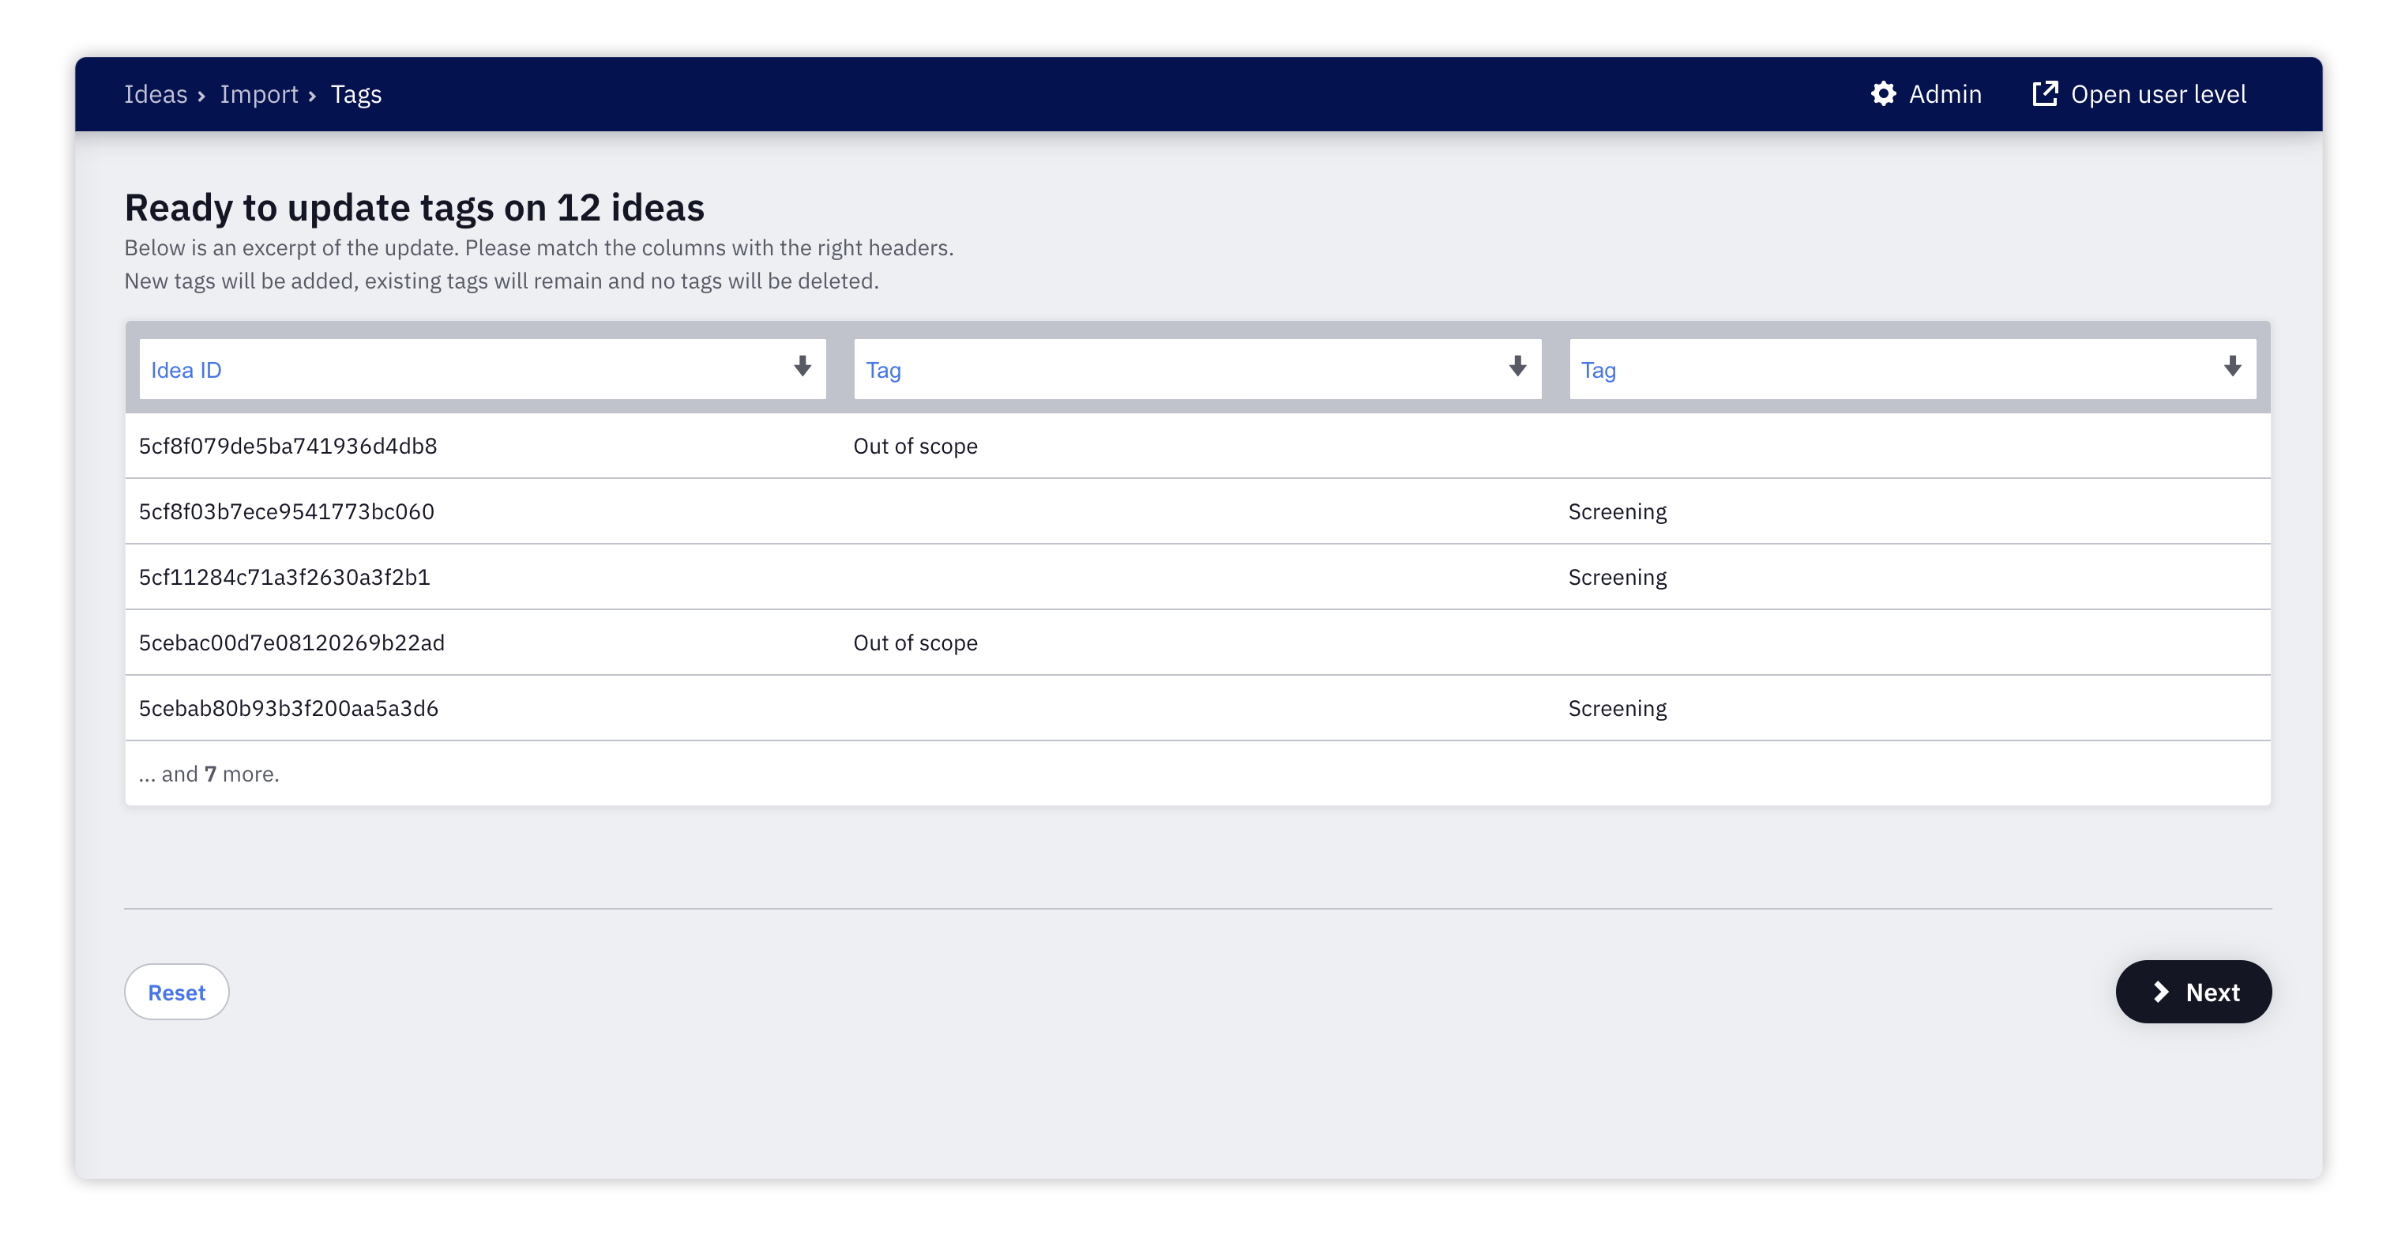
- If the report looks alright click on Import.
Edit tags
- Click on Admin and then on Tags in the drop-down menu.
- Click on

next to the tag you want to edit, change the name of the tag and then click on Update.
We hope this article has been useful for you.
**If you need more help,**feel free to reach us: